Choosing the Best Paint for Surface Applications

Intro
In any home, the choice of paint plays a crucial role in overall aesthetics and functionality. Traditionally, surface preparation has demanded extensive effort, especially sanding, to achieve a smooth and even application. However, recent innovations in paint technology have given rise to products that allow homeowners and design enthusiasts to bypass the tedious sanding process.
This guide focuses on effectively choosing paints that can be applied without sanding. It is intended for those who wish to enhance their living spaces efficiently. From understanding various paint types and their suitability for different surfaces to exploring application techniques and modern trends, this article provides a thorough exploration of options.
Design Inspiration
Current Interior Design Trends
Interior design is in constant flux, with trends gaining popularity as quickly as they fade. Currently, there is a strong inclination towards minimalism, where simplicity brings elegance to spaces. Neutral tones, particularly grays, beiges, and whites, are favored. These colors can be paired with bolder accents, creating a balanced yet dynamic visual impact.
Textured paints, like those with a matte finish or satin sheen, present appealing alternatives. They effectively mask imperfections that sanding would traditionally address. As such, many homeowners find that these textures not only improve the look but also add depth to their walls.
Color Palettes and Their Effects
The colors chosen for your walls greatly influence not only the style but also the mood of your environment. Warmer hues like soft yellows and pastel oranges are known to evoke feelings of comfort and warmth, while cooler shades like blues and greens can provide a refreshing, calming effect.
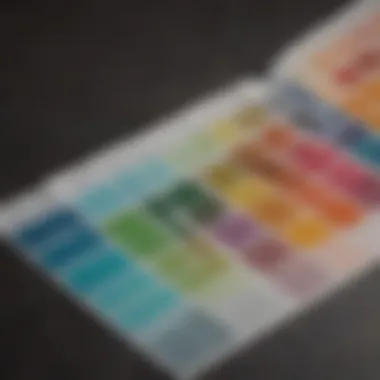
When selecting a color palette, consider the size of the room and the amount of natural light it receives. For instance, light colors can make a small room appear larger, while darker tones create a cozy atmosphere. Moreover, incorporating a color wheel can help in choosing harmonious color combinations for various surfaces in the home.
"Color is the keyboard, the eyes are the harmonies, the soul is the piano with many strings." - Wassily Kandinsky
In summary, trends in interior design emphasize both functionality and aesthetics. Choosing the right paint, especially those that do not require sanding, aligns well with these principles. This inspires creativity in homeowners and decorators alike, facilitating the personal expression of ideas without the labor-intensive preparation.
Prelims to Painting Without Sanding
Sanding is traditionally seen as a necessary step to promote paint adhesion. However, many paint products are engineered to bond effectively with various surfaces without this preparatory work. This is especially beneficial for those who may not have the tools or skills for sanding or simply for those wishing to minimize preparation time before painting.
Understanding the Concept
The core idea behind painting without sanding lies in the development of modern paint formulations. These paints, like acrylic or chalk paint, contain specialized additives that allow them to adhere to surfaces with existing finishes or materials.
When utilizing these paints, it is vital to ensure the surface is clean and free from contaminants that might impede adhesion. This method supports a seamless workflow, which is particularly appealing for DIY projects.
Homeowners can easily refresh their living spaces with new colors, textures, or finishes without the laborious process of sanding. As a preference grows for quicker and more efficient home improvement tasks, understanding this concept becomes increasingly important.
Benefits of Skipping Sanding
Opting to skip sanding comes with several advantages. Here are some of the key benefits:
- Time Savings: Without the need for sanding, the overall painting process becomes quicker. Homeowners can often complete a project in a single day rather than spanning it across multiple sessions.
- Less Mess: Sanding typically generates dust and debris. Skipping this step reduces cleanup time and minimizes the disruption to your living space.
- Accessibility: Not every homeowner has access to sanding tools or knows how to use them effectively. Paints designed for no-sanding applications make it easier for anyone to take on a paint project.
- Preservation of Surface: Some surfaces may be delicate or may suffer damage if sanded. Using no-sanding paint helps maintain the integrity of such surfaces.
- Variety of Options: The range of paints available for no-sanding applications allows for creativity. There are choices for various aesthetics and functions, from chalk paints suitable for rustic finishes to acrylics that feature a smooth, durable outcome.
Given these benefits, homeowners can confidently explore the option of painting without sanding. This article aims to provide a comprehensive guide on selecting the right paint and achieving desired results on various surfaces.
Types of Paint Suitable for No-Sanding Projects
Acrylic Paint
Acrylic paint is a versatile medium known for its fast-drying qualities and ease of use. It adheres well to numerous surfaces, including wood and metal, making it a popular choice for DIY projects. Compared to traditional oil-based paints, acrylics emit fewer fumes and are easier to clean up since they can be diluted with water. The variety of finishes available—from matte to high gloss—offers flexibility in creativity. When choosing acrylic paint for no-sanding applications, ensure that the surface is properly cleaned to maximize adhesion.
Chalk Paint
Chalk paint has gained popularity for its unique matte finish and chalky texture. It is particularly favored for furniture refinishing. This type of paint requires minimal prep work and adheres well even to surfaces that are not sanded. The rich pigments in chalk paint offer great coverage, and it can be left unsealed for a rustic look or sealed with a wax finish for durability. Although it is user-friendly, applying a primer can improve adherence if the surface has a glossy finish.
Milk Paint
Milk paint is an eco-friendly option made from natural ingredients like casein, clay, and pigments. This paint is known for its softness and ability to create a vintage appearance. It is ideal for porous surfaces such as wood. Due to its composition, milk paint can adhere to surfaces without the need for sanding. However, it usually requires a binding agent when applied to non-porous materials. Its aesthetic and sustainable aspects make it a choice for those who appreciate natural materials and unique finishes.
Bonding Primers
Bonding primers serve as a bridge between the substrate and paint, allowing for excellent adhesion. Ideal for surfaces that are slick or glossy, they help the topcoat stick without sanding. Many manufacturers offer specialty bonding primers that are compatible with a range of materials including plastic and metal. This primer is particularly beneficial when painting over previously finished surfaces where sanding is not feasible. By using a bonding primer, one can enhance durability and longevity of the paint while achieving a smoother finish.
"Using the right paint can save both time and effort in your painting projects, allowing for a successful outcome without the need for sanding."
Selecting the right type of paint suitable for no-sanding projects is crucial for achieving the desired results. Each type has its strengths and applications, making it essential to understand their properties to make informed decisions for your projects.
Surface Types and Compatibility
Understanding surface types is essential when it comes to painting without sanding. Different materials have unique characteristics that affect how paint adheres and performs. Compatibility between the paint and the surface can determine the longevity and quality of the finish. Homeowners and interior design enthusiasts should carefully evaluate their surfaces before making a paint choice. Here we explore distinct surfaces and highlight key considerations.
Wood Surfaces
Wood surfaces are commonplace in homes, and painting them without sanding is quite feasible. When painting wood, one must consider the type of wood and any previous finishes that were applied. Using acrylic or chalk paint can yield excellent results, as they bond well to wood. Ensure the wood is clean and dry before painting. If there are imperfections such as scratches or gouges, they should be repaired prior to application. It's prudent to choose a paint specifically designed for wood to ensure durability.
Metal Surfaces
Metal surfaces present different challenges. Compatibility is crucial, as paints designed for other materials may not adhere well to metal. Bonding primers are especially important here, as they create a solid foundation for the paint. For rusted metal, a specific rust-inhibiting primer should be used. Once primed, apply a suitable paint that offers good coverage. Acrylic paint is often a good choice for metal surfaces, providing a tough finish that withstands the elements.
Plastic and Laminate
Plastic and laminate surfaces often require special attention due to their slick, non-porous nature. Regular paints will likely peel or not adhere well. The solution here is using specific paints formulated for use on plastics. Bonding primers can also enhance adhesion. Ensure the surface is clean, and consider lightly scuffing it with fine sandpaper (even if complete sanding is avoided) to improve grip for the paint. These steps will help achieve a smooth and long-lasting finish.
Glass and Ceramics
Glass and ceramics pose unique challenges as well. Painting on these surfaces necessitates extreme care. A good option is to use specially formulated glass paints or high-adhesion primers. Ordinary latex paints typically do not bond well, leading to frequent failure. Before applying paint, the surface should be scrubbed clean to remove any oils or debris. Once smooth and cleaned, use a spray technique for an even application that avoids streaks. A clear sealant after the paint dries can add extra durability to the finish.
"Choosing the right paint for each surface not only ensures a beautiful finish but also guarantees the paint adheres properly and lasts longer."
By understanding the specific requirements of different surfaces, you can make informed decisions. This will ultimately lead to a more satisfying and effective painting experience.
Preparation for Painting
Before undertaking any painting project without sanding, preparation is crucial. Proper preparation ensures that the paint adheres well to the surface, which is especially important when you skip sanding. Many people underestimate this step, but it can determine the success or failure of a painting job.
One of the main benefits of preparation is that it enhances the durability of the final finish. By thoroughly preparing the surface, you reduce the chances of issues like paint peeling. Additionally, you create an even texture for the paint, resulting in a more appealing aesthetic outcome. Other considerations include the type of surface you are painting and the specific paint that will be used.
Effective preparation has three essential components: cleaning the surface, making necessary repairs, and testing for adhesion. Each of these steps plays a significant role in ensuring that the finished product meets your expectations.
Cleaning the Surface
Cleaning is the first step in the painting process. Dust, grease, and grime can prevent paint from adhering properly. Begin by using a mild detergent mixed with warm water. Use a sponge or cloth to wipe down the surfaces thoroughly. For tough stains, consider using a mixture of vinegar and water.
Once you have cleaned the area, rinse it with clean water to remove any remaining residue. Make sure to allow the surface to dry completely. This step is vital, especially for glossy or slick surfaces. If not dried properly, moisture can become trapped, leading to poor adhesion and long-term problems.
Repairs Prior to Painting
Before applying paint, inspect the surface for any damage. Look for cracks, holes, or chips that may need filling. If any spots are found, use an appropriate repair material like spackling compound or caulk to fill in these imperfections.
Once the repairs are made, allow them to dry fully. Sand the area, even if lightly, to make it smooth. It is important to remember that while there is no sanding for the entire project, localized sanding may be necessary to ensure a proper finish. This step not only enhances the appearance but also improves the paint's adherence to the surface.
Testing for Adhesion
After the surface is clean and repairs are done, it is essential to check the adhesion of your selected paint. You can do this by applying a small amount of paint in an inconspicuous area, allowing it to dry, and simply observing how it adheres. If the paint sticks well and shows no signs of peeling or flaking, you are good to proceed with the main application.
This small test can save you from major headaches later. If there are issues with adhesion, consider using a primer specifically designed for the surface at hand. Primers can significantly improve paint adhesion, particularly on surfaces that typically resist paint.
"Proper preparation is the key to successful painting, especially when you skip sanding!"
Application Techniques for No-Sanding Paint
When embarking on a painting project that skips the sanding step, understanding the application techniques is crucial. These techniques can maximize the durability and aesthetic appeal of the finish. Proper application ensures the paint adheres well to the surface, maintaining the intended look longer. Homeowners, interior design enthusiasts, and anyone interested in home improvement will benefit from mastering these methods.
Brush Application
Using a brush for painting without sanding is effective for smaller areas and detailed work. A high-quality, synthetic brush works well for water-based paints, while natural bristle brushes suit oil-based formulas. Opt for a brush size that matches the detail of your task. A smaller brush can navigate tight spaces, while a larger one covers broader areas. For optimal results, dip the brush about one-third into the paint, allowing excess paint to drip off before applying it to the surface. This helps avoid drips and runs.
Keep in mind that applying paint in thin coats allows it to adhere properly. If too much paint is applied at once, it may lead to sagging or uneven textures. After applying, lightly brush over the painted area to smooth out any visible lines or brush strokes. This technique enhances the overall appearance.
Roller and Spray Techniques
Rollers and spray guns provide two distinct methods for applying paint without sanding. Rollers are practical for larger, flat surfaces. They distribute paint evenly and efficiently. Choose a roller sleeve with the appropriate nap length, depending on your surface texture. A smooth surface suits shorter naps, while a rough texture requires longer naps.
Conversely, spray painting delivers a fine, even coat, ideal for complex shapes. Adjust the pressure settings for the spray gun carefully. This ensures a controlled application without overspray. It's advisable to practice on cardboard or similar material to get accustomed to the technique.
Both methods necessitate proper ventilation and protective gear. Using masks and goggles helps shield from paint particles. This is particularly important when working indoors.
Layering and Drying Times
Layering is a significant aspect of any painting project, especially when you skip sanding. Applying multiple thin layers improves coverage and adhesion. It also helps mitigate common issues like peeling or bubbling. Each layer should be allowed to dry completely before adding another. The drying time varies based on environmental conditions and the type of paint selected. Generally, water-based paints dry faster than oil-based varieties.
It is wise to read the product instructions carefully to determine the recommended drying times. Wait at least a few hours between coats for best results. In humid conditions, allow for longer drying periods. You can ensure a smoother finish and better durability in the long run by exercising patience during this stage.
Key Takeaway: Mastering these application techniques ensures the paint adheres well and lasts longer, contributing to a successful no-sanding project.
Finishing Touches After Painting
After completing the painting process, the finishing touches are essential to ensure the longevity and appearance of your work. These last steps not only enhance the overall quality of the finish but also protect it from potential damage that can occur over time. Addressing these details properly helps in achieving a professional look while minimizing future maintenance.
Sealing and Protecting the Finish
Sealing is a critical step to preserve your newly painted surface. It serves as a barrier against moisture and dirt, which can lead to fading or peeling paint. For best results, choose a sealant compatible with the type of paint used. For example, an acrylic sealant works well with acrylic paints, while a polyurethane finish complements both latex and oil-based paints.
Applying a sealant correctly involves the following steps:
- Choose the Right Sealant: Examine the specific needs of your project. For high-traffic areas or surfaces that may experience weather exposure, opt for a durable, outdoor-safe sealant.
- Application: Use a clean, high-quality brush to apply an even coat of sealant. Pay attention to corners and edges to cover all exposed areas. Depending on the product, a second coat may be necessary after the first has dried completely.
- Drying Time: Allow the sealant to cure as per manufacturer instructions before using the painted surface.
The benefits of sealing include enhanced gloss, protection from stains, and straightforward maintenance. It’s also recommended to test the sealant on a small, inconspicuous area before full application to ensure it doesn’t alter the paint’s color or texture.
Cleaning Tools and Workspace
Once your paintwork is complete and sealed, it's important to clear your workspace efficiently. Some key considerations include:
- Clean Your Brushes and Rollers: Remove paint from tools immediately after use, as dried paint can ruin brushes and rollers. For water-based paints, rinse with water until the water runs clear. For oil-based paints, use the appropriate solvents like mineral spirits.
- Store Leftover Paint Properly: Seal the paint can tightly and store it upside down to create a water-tight seal. This also prolongs the life of your paint. Label the can with the color and date to easily identify it in the future.
- Disposing of Waste: Follow local guidelines for disposing of paint and solvents. Many communities provide drop-off locations for hazardous waste.
Organizing tools and cleaning up a workspace not only provides a tidy environment but also prepares you for your next project. Proper maintenance of tools adds to their lifespan, ensuring they are always ready for use whenever needed.
Remember: Finishing touches are as crucial as the painting process itself. Skipping these can result in less satisfying outcomes and future problems, making extra effort worthwhile.
Troubleshooting Common Issues
Troubleshooting common issues is vital when choosing paint for surfaces without sanding. Understanding potential problems can save time and frustration. When selecting the right paint and applying it correctly, homeowners and interior design enthusiasts can achieve satisfying results. However, they may encounter challenges that need addressing.
Identifying the specific issue allows for a more targeted approach to solutions. Common problems include paint peeling, bubbling, and fading. Knowing these issues in advance can guide your choice of products, tools, and techniques.
Paint Peeling or Bubbling
Paint peeling or bubbling can occur due to a variety of reasons. One common cause is insufficient surface preparation. Even without sanding, ensuring the surface is clean and dry is essential. Dust or moisture trapped under the paint creates weak bonds. This weak bond leads to paint lifting away from the substrate.
Additionally, applying paint in temperatures that are too cold can cause bubbles. The paint does not adhere correctly in these conditions, leading to a failed finish. To prevent bubbling, always check the manufacturer’s recommendations regarding temperature. Moreover, ensuring even application thickness is crucial. Excessive paint can trap air, resulting in bubbles forming.
Inconsistent Coverage
Inconsistent coverage is another issue that may arise when painting without sanding. This can result from using the incorrect type of paint for the surface material. Each paint type has its own properties that dictate how well it adheres and covers different surfaces. For example, acrylic paint may not perform well on glossy, high-sheen surfaces unless a specialized primer is used.
For optimal outcomes, always use paint expressly designed for the material at hand. Following the manufacturer's guidelines on application thickness can also lead to more uniform coverage. It is advisable to utilize multiple thin coats rather than one thick coat. This method enhances adhesion and contributes to a smooth finish.
Fading or Yellowing Over Time
Fading or yellowing paint can diminish the aesthetic appeal of any project. This problem may develop due to exposure to sunlight, temperature variations, or the type of paint used. Certain lower-quality paints are prone to yellowing, especially in spaces with little light. Choosing high-quality, UV-resistant paints can mitigate this issue.
Furthermore, ensure that the environment is suitable for the paint type selected. Some paints hold up better in humid conditions than others. Monitoring the paint's condition over time will help identify if fading is occurring more quickly than expected. Taking preventive steps, such as applying a protective topcoat, can prolong the life of the paint finish.
Ending and Recommendations
When selecting paint, consider the adhesion properties, finish, and durability of the products. Using the right bonding primers can often ensure a long-lasting effect without the need for sanding. Also, understanding application techniques can further enhance the quality of the final result.
Key Considerations:
- Assess the surface type thoroughly; wood, metal, plastic, and ceramics each demand different solutions.
- Opt for paints specifically designed for no-sanding applications to save time and achieve better results.
- Always conduct adhesion tests to avoid any surprises post-application.
By following these recommendations, you can confidently navigate the world of paints that allow for surface preparation without sanding. The right choices will not only improve the aesthetic appeal but also ensure functional longevity.
Choosing the Right Paint for Your Needs
The various types of paint available today offer unique properties. For example, acrylic paints are often favored for their durability and fast drying times. They bond well to different surfaces and offer a range of finishes. If a vintage look is desired, chalk paint is a suitable option, known for its matte finish and ease of use. Milk paint, while eco-friendly, requires some skill in application. Bonding primers are excellent for ensuring adherence on slick surfaces.
Consider the following factors when selecting paint:
- Intended Use: Is the surface inside or outside? Will it face wear and tear?
- Aesthetic Preferences: Do you want a glossy, satin, or matte finish?
- Health and Safety: Look for low-VOC options if indoor air quality is a concern.
Identifying these needs clearly will simplify your choice.
Final Thoughts on Painting Without Sanding
Ultimately, the goal is to achieve the best possible finish with minimal effort. By selecting the appropriate paint and following proper application techniques, each project can meet or exceed expectations. Avoiding sanding is not just about saving time; it opens up new possibilities for creativity in home design.
"Understanding the right paint for your surface leads to efficient solutions without compromise."


