Removing a Sink Strainer: Step-by-Step Guide
Intro
Removing a sink strainer can seem like a simple task, yet it is often filled with intricacies that can frustrate even the most seasoned DIY enthusiast. Understanding the components of the sink strainer system is vital. This article seeks to unravel the complexities of this procedure, providing a comprehensive guide that emphasizes clarity and efficiency. By equipping readers with essential tools, practical steps, and best practices, homeowners can approach this task with confidence.
Maintaining plumbing fixtures is not just about aesthetics or immediate functionality. Regular cleaning and maintenance of sink strainers prevent clogs and costly repairs in the future. As a result, getting familiar with the process and knowing when to engage in this routine task can lead to more effective home management and a better understanding of plumbing systems.
Understanding the Sink Strainer
The sink strainer serves an essential role in household plumbing. Understanding its purpose is critical for successful maintenance and repair tasks. A sink strainer enhances the functionality of the sink while preventing costly damages. By grasping the key aspects of a sink strainer, homeowners can ensure proper upkeep and address potential plumbing issues before they escalate.
Definition of a Sink Strainer
A sink strainer is a plumbing device designed to catch debris and prevent clogs in the drain. It usually consists of a perforated metal or plastic component that fits snugly into the sink's drain opening. When water flows down the sink, solid particles are trapped, allowing only liquids to pass through. This simple mechanism plays a significant role in maintaining the sink's efficiency.
Functions of a Sink Strainer
The primary functions of a sink strainer include the following:
- Debris Management: Strainers prevent food scraps, hair, and other waste from entering the plumbing system. By trapping these materials, they minimize the risk of clogs.
- Drain Protection: A well-functioning strainer protects the pipes from a buildup of waste, reducing the need for frequent plumbing services.
- Easy Cleaning: Most sink strainers are removable, making it easy to clean them regularly. This promotes hygiene in the kitchen or bathroom and contributes to better drain performance.
Common Materials Used in Sink Strainers
Sink strainers can be made from various materials. The choice affects durability, maintenance, and performance. Common materials include:
- Stainless Steel: Known for its resistance to rust and corrosion, stainless steel is a popular choice. It is also easy to clean and complements many kitchen aesthetics.
- Plastic: Plastic strainers are lightweight and affordable. However, they might not be as durable as metal options. Careful handling is necessary to avoid breaks or cracks.
- Bronze: This material offers a distinctive look and excellent durability. Bronze strainers can often resist corrosion, making them suitable for long-term use.
Understanding the functions and materials of sink strainers allows homeowners to make informed choices during maintenance or replacement. A proactive approach can lead to smoother plumbing experiences and a more efficiently managed household.
Importance of Regular Maintenance
Maintaining your sink strainer is not merely a task to consider occasionally; it is paramount for ensuring the functionality of your plumbing system. Regular maintenance prevents costly repairs and allows your fixtures to operate effectively. Overlooking this can lead to a series of problems that may escalate quickly, given that water flow is crucial in any home.
Preventing Clogs and Blockages
One of the fundamental reasons for regular maintenance is the prevention of clogs and blockages. A sink strainer is the first line of defense against debris entering the plumbing system. Food particles, hair, and other residues can accumulate over time, leading to obstruction. If not addressed, these blockages can hinder water flow and cause frustrating backups. Regularly cleaning or replacing the strainer helps alleviate these issues, keeping your sink functioning optimally.
Extending the Lifespan of Fixtures
Another significant benefit of maintaining the sink strainer is the extended lifespan of your plumbing fixtures. Neglecting maintenance can lead to build-up that not only clutters the strainer but also impacts the durability of the surrounding pipes. By keeping the strainer clean and in good condition, you can reduce wear and tear, ultimately resulting in fewer replacements and repairs. This proactive approach conserves not just the strainer but also the entire plumbing system.
Avoiding Water Damage
Water damage is another serious consequence of a poorly maintained sink strainer. Blockages may cause overflow situations that can ruin cabinetry, flooring, and walls. Such damage is not only costly in terms of repairs but can also lead to more serious issues like mold growth and structural damage. Regularly checking and maintaining the strainer significantly reduces this risk, safeguarding your home and investment.
"An ounce of prevention is worth a pound of cure." Regular maintenance can prevent costly water damage and extend the life of your fixtures.
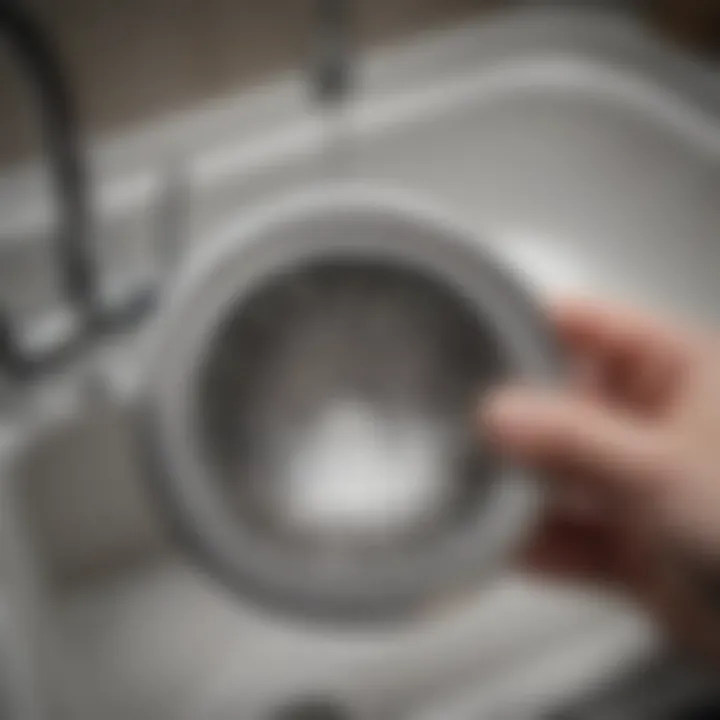
In summary, prioritizing the maintenance of your sink strainer is crucial for several reasons. It prevents clogs and blockages, extends the lifespan of your fixtures, and helps avoid potentially devastating water damage. By integrating maintenance into your regular routine, you can keep your plumbing functioning effectively and efficiently.
Necessary Tools for Removal
When it comes to removing a sink strainer, having the right tools is crucial. The process requires precision and care, which cannot be achieved without adequate equipment. Each tool plays a vital role, ensuring efficiency and safety throughout the task. Using the wrong tool can lead to damage, unnecessary stress, or even injury. Ensuring you have the necessary tools ready before starting can make the process smoother and less time-consuming.
Basic Hand Tools
Basic hand tools are often the first line of defense in any home repair or maintenance task. For removing a sink strainer, the following hand tools are essential:
- Adjustable Wrench: This tool is ideal for gripping and turning the nuts securing the strainer.
- Screwdriver: Depending on your sink strainer type, a flathead or Phillips screwdriver may be needed to remove screws.
- Pliers: Useful for holding objects firmly and for twisting or removing parts that are hard to grip.
- Bucket: Often overlooked, a bucket can catch any debris or water that may spill during the removal process.
These tools allow for basic manipulation and adjustment, which is often required in plumbing tasks. Having these tools ensures that you can address various needs as they arise immediately.
Specialized Plumbing Tools
While basic hand tools are important, specialized plumbing tools enhance effectiveness and scope. They may not be needed for every job but can come in handy depending on the specific situation. Here are some tools worth considering:
- Pipe Wrench: This is designed for gripping and turning pipes, especially useful if the strainer connection is very tight.
- Plumber's Snake: If the strainer is clogged, this tool helps to remove any buildup that could hinder the removal process.
- Strainer Wrench: Specifically designed for loosening and tightening strainers, this tool provides the leverage necessary for stubborn fixtures.
Incorporating specialized plumbing tools not only speeds up the process but also minimizes wear on other tools while prolonging their lifespan.
Safety Equipment
Safety should always be a priority when working with plumbing fixtures. Although this task may seem straightforward, certain precautions are necessary to prevent accidents. Here is a list of safety equipment that may be required:
- Safety Goggles: Protect your eyes from splashes and debris that may occur during removal.
- Gloves: Wearing gloves not only protects your hands from sharp edges but also from any possible chemicals.
- Knee Pads: If you are working in a confined space or on a hard surface, these will make working more comfortable.
Investing in safety equipment ensures that you can perform your tasks with confidence, knowing that you are protected from potential hazards.
A thorough preparation with the right tools and safety gear can significantly reduce the risks associated with plumbing tasks.
Preparation Before Removal
Preparation is an essential phase when it comes to removing a sink strainer. It ensures that the entire process proceeds smoothly. Rushing into this task without adequate preparation can lead to complications that may arise from leaks, tools not being at hand, or foreign objects obstructing the work area. Hence, this section focuses on three primary elements of preparation: turning off the water supply, clearing the area, and gathering necessary tools.
Turning Off Water Supply
The very first step in preparation involves turning off the water supply. It is vital to prevent any unwanted water flow during the removal process. If water is running, it can lead to flooding in your sink area or cause unexpected leaks. Usually, the shut-off valve is located under the sink. It is just a twist away. Ensure that you turn it clockwise until it stops. If you cannot find this valve, you might need to switch off the main water supply to your home for the duration of the task. This critical action protects your fixtures and makes the process more manageable.
Clearing the Area
Next is clearing the area around the sink. A cluttered workspace can lead to accidents. Remove any items from the countertop and the sink to create ample space for your hands to move and tools to be used efficiently. This might also involve emptying the sink of dishes and debris. By doing this, you prevent mishaps that may arise from dropped items and have more visibility while you work on the sink strainer.
Gathering Tools
Finally, gathering the necessary tools is foundational for success. Those tools include basic hand tools like a wrench or pliers. You may also require a specialized tool such as a sink strainer wrench. Many homeowners overlook these necessary tools, which can lead to frustration mid-task. Organize your workspace ahead of time; having everything ready will hasten the process and prevent the need for continuous trips to the toolbox. Ensure safety equipment is also in place to protect yourself from possible injuries.
"Preparation is key to success; without it, your task may become unnecessarily complicated."
In summary, preparing effectively not only boosts confidence but also guarantees a smoother sink strainer removal process. Thorough preparation is an investment of time that pays off by reducing complications and ensuring everything runs seamlessly.
Step-by-Step Guide to Removing a Sink Strainer
The removal of a sink strainer is a task that can seem daunting for some homeowners. However, the ability to complete this process efficiently equips individuals with greater control over plumbing maintenance. This section details the procedure systematically, emphasizing the importance of following each step
Loosening the Strainer Assembly
The first stage in removing a sink strainer involves loosening the strainer assembly. This process is crucial because a tightly secured assembly can lead to complications later on. To begin, grasp the strainer firmly while rotating it counterclockwise. In some instances, you might need an adjustable wrench for extra torque. Ensure not to apply excessive force which could result in damage to the sink or the strainer itself. If it does not budge, you can apply a penetrating oil on the threads and allow it to sit for a few minutes to facilitate loosening.
Unscrewing Locknuts
After loosening the strainer assembly, the next step is unscrewing the locknuts. These components secure the strainer in place, often hiding beneath the sink. A basin wrench can be particularly useful in this phase as it allows access to difficult spots. Slowly turn the locknuts to the left, taking care to not disturb any existing plumbing connections. If you encounter any resistance, using some lubricant can help ease the process. Always check that the locknuts are indeed the correct ones for removal to avoid damaging other fittings.
Detaching the Strainer from the Sink
Finally, detaching the strainer from the sink is the concluding step in this process. With the assembly loose and the locknuts removed, you can now lift the strainer out of its housing. If there are any remnants, such as old putty or debris, cleanse the area thoroughly to prepare for a new strainer installation. Also, inspect the hole for any signs of wear or damage. This will ensure your new strainer will fit snugly and function correctly without leaks.
Once removed, you might want to evaluate the condition of the old strainer for patterns of wear, especially if you plan to replace it with a new one.
This process is an essential part of maintaining plumbing efficiency, making regular checks on your sink strainer a recommended practice for every homeowner.
By following these steps, homeowners can effectively remove their sink strainer with minimal hassle, ensuring their plumbing system remains functional and efficient.
Dealing with Common Challenges
Removing a sink strainer can be straightforward, yet various challenges often arise during the process. Understanding these issues is crucial for effective removal and maintenance. This section explores common obstacles faced by homeowners when dealing with sink strainers, offering solutions to each potential roadblock. By recognizing these challenges ahead of time, you can strategize effectively and reduce the risk of complications during the removal process.
Stubborn Strainers
Stubborn strainers are a frequent hurdle in sink maintenance. Over time, debris, grime, and mineral buildup can cause a strainer to adhere tightly to the sink. This makes removal both difficult and frustrating. If, despite your best efforts, a strainer refuses to budge, applying penetrating oil can provide relief. Products like WD-40 can help break down rust and loosen any buildup. After application, let it sit for a few minutes, giving it time to work before attempting to loosen the strainer assembly again.
Another method to consider is using a proper wrench or pliers adequately. Ensure you have a good grip on the assembly, but be cautious not to apply too much force, as this can damage the sink or surrounding pipes. When dealing with stubborn strainers, patience is important. Rushing through can lead to mistakes and further complications with your plumbing.
Corroded Components
Corrosion can complicate the removal of sink strainers as well. Metal components may rust, making them difficult to unscrew. Inspect the strainer and its surrounding components for any visible signs of corrosion. If corrosion is present, try to gently scrub the affected areas with a wire brush or similar tool. For severe corrosion, using a rust dissolver can be helpful. Ensure you follow the product's instructions carefully, as improper application can damage your fixtures.
In some cases, if corroded components will not loosen, replacement of those parts may be necessary. This could involve replacing the locknut or the entire strainer depending on the severity of the corrosion. Staying proactive about inspections and regular maintenance can help avoid these scenarios in the first place.
Limited Workspace


A cramped space under the sink can make the removal of a strainer even more challenging. Limited workspace often restricts movement, making it hard to maneuver tools effectively. To address this issue, start by clearing any items stored under the sink. This includes cleaning supplies, food items, or any other potential obstructions.
Additionally, using compact tools designed for tight spaces can ease the process. Flexible wrenches or socket sets come in various designs to accommodate narrow areas. Keeping your tools organized and accessible helps save time and avoids frustration when working in small confines.
Lastly, if the environment becomes too cumbersome, consider using a handheld mirror for better visibility. Positioning the mirror can help you see angles you would not easily view otherwise. Being prepared and knowing how to tackle these common challenges will aid you in successfully removing a sink strainer and completing your maintenance tasks.
Post-Removal Considerations
After removing the sink strainer, there are essential steps to take. This phase is crucial as it ensures the proper maintenance of your plumbing system and helps to avoid future complications. Failing to address post-removal concerns can lead to unnecessary repairs, decreased functionality, or even water damage.
Cleaning the Area
Cleaning the area after the strainer's removal is more than just a good practice; it is necessary. This stage involves clearing away debris such as food particles, grease, or sediment that may have accumulated around the sink basin. Not only does this improve hygiene, but it also keeps the plumbing free from potential blockages.
To effectively clean the area:
- Use a sponge or cloth to wipe down the sink surface.
- Clear out the drain opening and inspect for trapped debris.
- Consider using a mild detergent to eliminate any unwanted odors or residues.
- Discard any items collected and ensure they do not re-enter the plumbing.
Regular cleaning prevents buildup and can make future maintenance easier.
Inspecting for Damage
Once the area is cleaned, inspecting for damage is an important step. Check the sink and surrounding components for signs of wear or corrosion. Look carefully at the sink’s surface, faucet, and any visible plumbing connections.
Key indicators to watch for include:
- Cracks in the sink material.
- Rust spots on metal components.
- Loose fittings or gaskets.
- Any water stains indicating leaks.
Identifying damage early can save significant time and resources. If damage is found, then repairs or replacements should be addressed promptly to prevent escalation.
Choosing a Replacement Strainer
Selecting a suitable replacement sink strainer is a critical decision. The right choice can enhance functionality and extend the life of your sink. While choosing, consider the following factors:
- Material: Choose between stainless steel, plastic, or brass. Stainless steel is often preferred for durability.
- Size: Ensure that the new strainer matches the sink opening.
- Design: Some strainers offer unique designs that minimize clogging or enhance flow.
Once you have an idea, visit specialized home improvement stores or online platforms. Reading reviews and checking specifications can help in making a well-informed decision.
"Regular maintenance and timely replacement of sink strainers are vital for plumbing efficiency."
Following these post-removal considerations will help maintain plumbing reliability and prevent future issues. With diligence, the sink's performance will improve and offer peace of mind.
Finale
Recap of the Process
To wrap up, the key steps for removing a sink strainer involve first preparing by ensuring the water supply is turned off and clearing the workspace. It is vital to gather the necessary tools, which may include basic hand tools and specialized plumbing tools, for a smooth process. Once ready, the strainer assembly is loosened, locknuts are unscrewed, and finally, the strainer is detached from the sink. Already following these steps, one can manage this task with greater confidence.
Final Thoughts on Maintenance
Regular maintenance of sink strainers yields numerous benefits. It not only helps to extend the lifespan of your sink and plumbing fixtures but also affords homeowners peace of mind. Understanding the importance of this process transforms a simple home maintenance routine into a proactive measure for safeguarding your living space. Homeowners should not overlook this task but instead consider it as an essential part of household upkeep.


